はじめに
今回はdotnet new 〇〇コマンドでプロジェクトを作成できるようなテンプレートの作成方法を紹介したいと思います。
$ dotnet new stringext
テンプレート "Example templates: string extensions" が正常に作成されました。
概要
例えば.NET SDKにプレインストールされているテンプレートであるコンソールアプリケーションのテンプレートを表すconsoleを利用するには以下のコマンドを打ち込みます。
$ dotnet new console
すると以下のファイル群が生成されます。
<project_folder>
|--- obj
|       |--- project.assets.json
|       |--- project.nuget.cache
|       |--- Test.csproj.nuget.dgspec.json
|       |--- Test.csproj.nuget.g.props
|       |--- Test.csproj.nuget.g.targets
|--- Program.cs
|--- Test.csproj
consoleのようなプロジェクト、ファイル、リソースを生成するテンプレートを自由に作ることができ、dotnet newコマンドからそのファイル群を生成することができます。
実装のイメージ
テンプレートに含めたい.csや.csproj, .slnなどをあらかじめ用意しておき、dotnet newコマンドのパラメーターや設定によってフォルダ名・ファイル名・ファイルの中身の文字列を置換できるように設定していくイメージです。
あくまで文字列置換なので、実は.NETを利用してないようなプロジェクトのテンプレートにも全然実用レベルで使えると思います。
.template.config/template.jsonについて
テンプレートを作成するにあたって.template.configというフォルダを用意して、template.jsonを中に作成する必要があります。
<project_folder>
|--- .template.config
        |--- template.json
template.jsonはテンプレートの設定ファイルでして、これが読めればほぼテンプレート作成方法をマスターしたようなものですので、先に紹介しておきます。
↓ template.jsonのサンプル
{
    "$schema": "http://json.schemastore.org/template",
    "author": "Me",
    "classifications": [ "Common", "Code" ],
    "identity": "ExampleTemplate.StringExtensions",
    "name": "Example templates: string extensions",
    "shortName": "stringext",
    "tags": {
      "language": "C#",
      "type": "item"
    },
    "symbols": {
      "ClassName":{
        "type": "parameter",
        "description": "The name of the code file and class.",
        "datatype": "text",
        "replaces": "StringExtensions",
        "fileRename": "StringExtensions",
        "defaultValue": "StringExtensions"
      }
    }
}
以下それぞれのプロパティについて重要そうなものを列挙します。
| プロパティ名 | 意味 | 必須 |
|---|---|---|
$schema |
template.jsonのスキーマ。http://json.schemastore.org/templateを記述しとけばOK |
o |
author |
テンプレートの作者 | x |
classifications |
検索で使用されるテンプレートの特性。dotnet newのタグとして表示されます |
x |
identity |
テンプレートを識別するユニークな名前 | o |
groupIdentity |
属するグループのID。複数のテンプレートを一つのテンプレートして表示する場合は利用します | x |
name |
テンプレート名。dotnew newのときにテンプレート名として表示されます |
o |
shortName |
CLIでテンプレートを選択するために利用する名前 | o |
tags |
付加情報を記述する際に利用します。languageを記述すると言語を指定でき、typeを記述するとテンプレートの種類(project or item or solution)を指定できます |
x |
symbols |
テンプレートで使用できるパラメーターの定義。重要なプロパティなので後述 | x |
postActions |
プロジェクト作成後にActionsを実行することができます。参考 | x |
constraints |
テンプレートを使用するための制約。参考 | x |
sourceName |
すべてのファイル名・ファイル中身に対して、sourceNameで指定した値を-nまたは--nameで指定した値に置き換えます。デフォルトではカレントディレクトリ名が適応されます |
x |
Reference for template.json · dotnet/templating Wiki · GitHub
symbolsは結構重要な要素なので深掘りします。
↓ symblosのサンプル
 "symbols": {
    "TargetFrameworkOverride": {
      "type": "parameter",
      "description": "Overrides the target framework",
      "replaces": "TargetFrameworkOverride",
      "datatype": "string",
      "defaultValue": ""
    }
}
| プロパティ名 | 意味 | 必須 |
|---|---|---|
type |
parameterを記述 |
o |
description |
パラメータの説明 | x |
datatype |
パラメータを使用する場合のパラメータの型。boolやchoice, float, int/integer, hex, text/stringがあります。デフォルト値はstring |
x |
replaces |
パラメータの値で置き換える値 | x |
fileRename |
ファイル名に対してのみ適応されるパラメータの値で置き換える値 | x |
defaultValue |
パラメータがユーザーに指定されていないときのパラメーターの規定値 | x |
isRequired |
必須かどうか | x |
enableQuotelessLiterals |
datatypeがchoiceのときのみ有効で、引用符なしで条件を指定できるようになります |
x |
allowMultipleValues |
datatypeがchoiceのときのみ有効で、複数の値を設定することができます |
x |
Reference for template.json · dotnet/templating Wiki · GitHub
datetypeのchoiceを用いると、.NETのバージョンを指定して置き換えることみたいなことを実現できます。
  "symbols": {
    "Framework": {
      "type": "parameter",
      "description": "The target framework for the project.",
      "datatype": "choice",
      "enableQuotelessLiterals": true,
      "choices": [
        {
          "choice": "netcoreapp3.1",
          "description": "Target netcoreapp3.1"
        },
        {
          "choice": "netstandard2.1",
          "description": "Target netstandard2.1"
        },
        {
          "choice": "netstandard2.0",
          "description": "Target netstandard2.0"
        }
      ],
      "replaces": "netstandard2.0",
      "defaultValue": "netstandard2.0"
    }
}
あとはターゲットプラットフォームを指定するように設定してみたり。
"symbols":
{
  "Platform": {
    "type": "parameter",
    "description": "The target platform for the project.",
    "datatype": "choice",
    "allowMultipleValues": true,  // multi-choice indicator
    "choices": [
      {
        "choice": "Windows",
        "description": "Windows Desktop"
      },
      {
        "choice": "MacOS",
        "description": "Macintosh computers"
      },
      {
        "choice": "iOS",
        "description": "iOS mobile"
      },
      {
        "choice": "android",
        "description": "android mobile"
      },
      {
        "choice": "nix",
        "description": "Linux distributions"
      }
    ],
    "defaultValue": "MacOS|iOS"
  }
}
プロジェクトテンプレートの作成
プロジェクトテンプレートとは
プロジェクトテンプレートは、すぐに実行ができるようなプロジェクトを作成できるテンプレートです。例えば冒頭で紹介したconsoleなんかが該当します。
.template.config/teplate.jsonファイルを配置する
前述の通り.template.config/template.jsonを配置してあげることで、テンプレートを作成することができます。
<project_folder>
|--- .template.config
        |--- template.json
今回はサンプルとして以下のような構成をとりました。contentフォルダにてdotnet new console -n consoleasyncを実行した後に.template.jsonを作成しました。
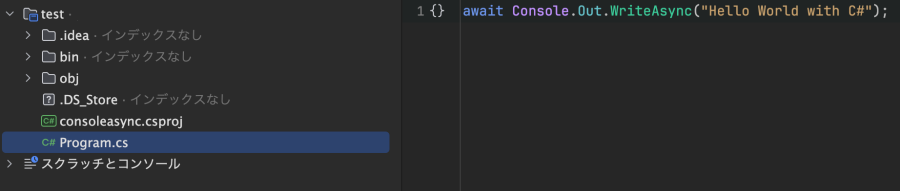
.
|--- test
|--- working
        |--- content
                |--- consoleasync
                        |--- .template.config
                        |       |--- template.json
                        |--- consoleasync.csproj
                        |--- Program.cs
// Program.cs
await Console.Out.WriteAsync("Hello World with C#");
template.jsonの中身を記述する
{
  "$schema": "http://json.schemastore.org/template",
  "author": "Me",
  "classifications": [ "Common", "Console" ],
  "identity": "ExampleTemplate.AsyncProject",
  "name": "Example templates: async project",
  "shortName": "consoleasync",
  "sourceName":"ExampleTemplate.AsyncProject",
  "tags": {
    "language": "C#",
    "type": "project"
  }
}
tags/typeがprojectなのでプロジェクトテンプレートになります。あとはsourceNameで記述することで、テンプレートを適応した際にExampleTemplate.AsyncProjectという文字列が-nか--nameで指定した文字列(指定していない場合はカレントディレクトリ名)に置換されるようになります。
テンプレートをインストールする
テンプレートをインストールする際にはテンプレートに含まれたくないファイル(今回はbinフォルダやobjフォルダ)を削除しておいてください。テンプレートをインストールするには、dotnet new installコマンドを利用します。
$ dotnet new install <.template.configが直下にあるフォルダへのパス>
インストールされているテンプレートの一覧を調べるには以下のコマンドを打ち込みます。
$ dotnet new list
テンプレート名      短い名前                    言語        タグ
------------------  --------------------------  ----------  --------------------------------
Example templates: async project           consoleasync                [C#]        Common/Console
プロジェクトテンプレートのテストをする
テンプレートのインストールを行なった状態で、以下の操作を行えるか確かめます。
- ターミナル等で
testフォルダに移動 dotnet new consoleasync -n MyProjectコマンドを実行し、テンプレート適応testフォルダ以下にプロジェクトが作成されていることを確認dotnew runを実行し、Hello World with C#が表示されることを確認する
$ cd <testフォルダへのパス>

$ dotnet new consoleasync -n MyProject
テンプレート "Example templates: async project" が正常に作成されました。

$ dotnet run
Hello World with C#
項目テンプレートの作成
項目テンプレートとは
項目テンプレートはすでに存在するプロジェクトに対して、追加でテンプレートを適応します。
.template.config/teplate.jsonファイルを配置する
今回はサンプルとして以下のような構成をとりました。
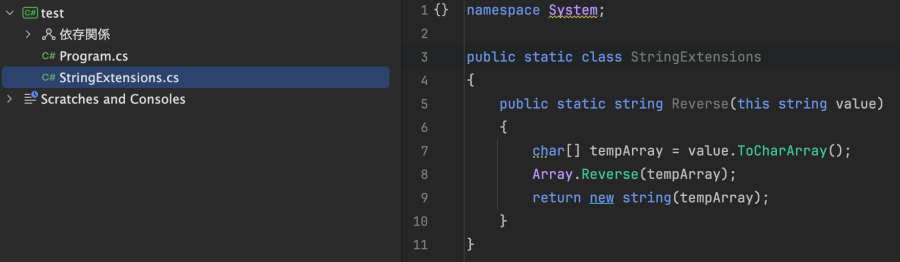
.
|--- test
|--- working
        |--- content
                |--- extensions
                        |--- .template.config
                        |       |--- template.json
                        |--- StringExtensions.cs
テンプレートソースが含まれるworkingフォルダ、テストをするためのtestフォルダに分けています。
StringExtensions.csは適当な.csファイルです。
namespace System;

public static class StringExtensions
{
    public static string Reverse(this string value)
    {
        char[] tempArray = value.ToCharArray();
        Array.Reverse(tempArray);
        return new string(tempArray);
    }
}
template.jsonの中身を記述する
テンプレートの設定はtemplate.jsonに書き込みます。
{
    "$schema": "http://json.schemastore.org/template",
    "author": "Hanachiru",
    "classifications": [ "Common", "Code" ],
    "identity": "ExampleTemplate.StringExtensions",
    "name": "Example templates: string extensions",
    "shortName": "stringext",
    "tags": {
      "language": "C#",
      "type": "item"
    },
    "symbols": {
      "ClassName":{
        "type": "parameter",
        "description": "The name of the code file and class.",
        "datatype": "text",
        "replaces": "StringExtensions",
        "fileRename": "StringExtensions",
        "defaultValue": "StringExtensions"
      }
    }
}
tags/typeにitemを指定したので、項目テンプレートになっています。またsymblosにより、StringExtensionsという文字列から-ClassName <text>で指定したtext(string)に変換がされます。これはファイル名・フォルダ名・ファイルの中身の全てに適応されます。
$ dotnet new stringext -ClassName MyExts
テンプレートをインストールする
テンプレートをインストールするには、dotnet new installコマンドを利用します。
$ dotnet new install <.template.configが直下にあるフォルダへのパス>
インストールされているテンプレートの一覧を調べるには以下のコマンドを打ち込みます。
$ dotnet new list
テンプレート名      短い名前                    言語        タグ
------------------  --------------------------  ----------  --------------------------------
Example templat...  stringext                   [C#]        Common/Code
項目テンプレートのテストをする
テンプレートのインストールを行なった状態で、以下の操作を行えるか確かめます。
- ターミナル等で
testフォルダに移動 dotnet new consoleコマンドを実行し、コンソールアプリケーションを作成dotnet new stringextを実行して、作成したテンプレート適応。StringExtensions.csが生成されます。
$ cd <testフォルダへのパス>
$ dotnet new console
テンプレート "コンソール アプリ" が正常に作成されました。

作成後の操作を処理しています...
/Users/----/Desktop/TestTemplate/test/test.csproj を復元しています:
  復元対象のプロジェクトを決定しています...
  /Users/----/Desktop/TestTemplate/test/test.csproj を復元しました (29 ms)。
正常に復元されました。

$ dotnet new stringext
テンプレート "Example templates: string extensions" が正常に作成されました。
またdotnet new stringext -C Hogeを実行すると、ファイル名・クラス名がHogeに置き換えられます。
テンプレートをアンインストールする
$ dotnet new uninstall <.template.configが直下にあるフォルダへのパス>
テンプレートパッケージ
テンプレートパッケージとはNuGetパッケージにパックされた1つ以上のテンプレートです。テンプレートパッケージをインストール/アンインストールすると、そのパッケージに含まれているすべてのテンプレートが追加/削除されます。
複数のパッケージを一括でインストールしたいときに利用できますが、この記事では紹介しないので気になる方は公式ドキュメントを参照してみてください。
learn.microsoft.com