はじめに
今回はGitHub Actionsで.NETのビルド&テストを実行する方法を紹介したいと思います。
やり方
.NETのビルド&テストをするワークフローはよくある典型なので、公式で用意してくれています。それを用いればとても簡単に設定できます。
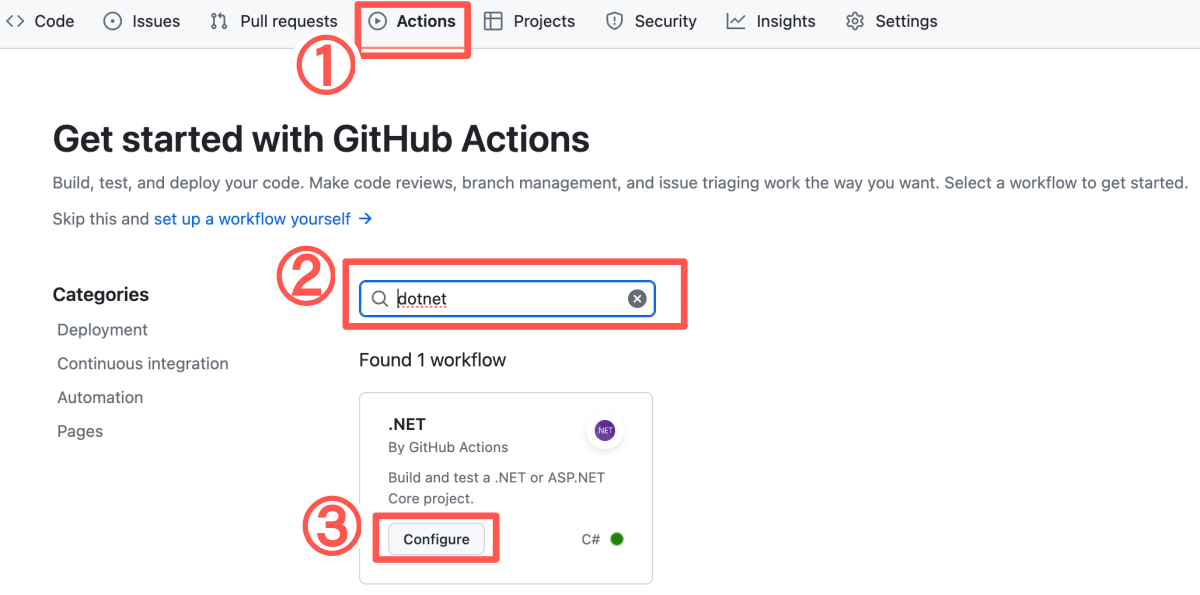
- リポジトリ名の下にある
Actionsをクリック dotnetを検索.NETのConfigureを選択

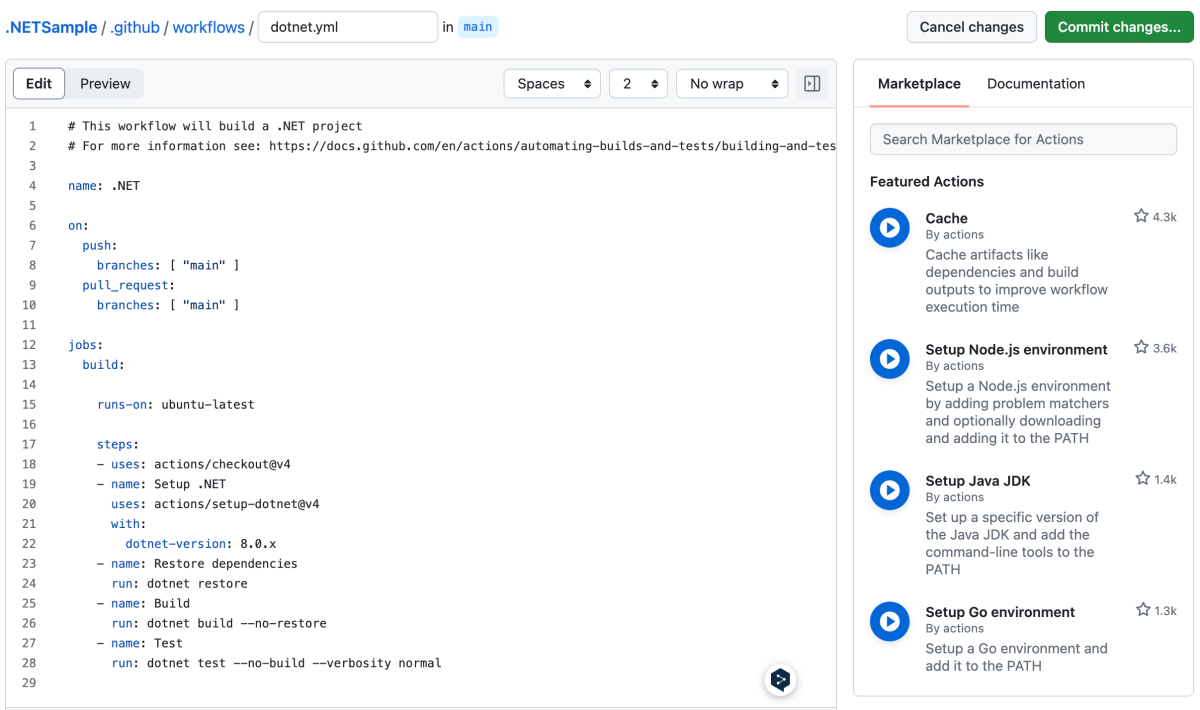
4. .NETのバージョンやワークフローが実行されるタイミングなど変更したい箇所があれば修正
5. Commit changes...を選択

↓ 用意されているワークフロー
# This workflow will build a .NET project
# For more information see: https://docs.github.com/en/actions/automating-builds-and-tests/building-and-testing-net

name: .NET

on:
  push:
    branches: [ "main" ]
  pull_request:
    branches: [ "main" ]

jobs:
  build:

    runs-on: ubuntu-latest

    steps:
    - uses: actions/checkout@v4
    - name: Setup .NET
      uses: actions/setup-dotnet@v4
      with:
        dotnet-version: 8.0.x
    - name: Restore dependencies
      run: dotnet restore
    - name: Build
      run: dotnet build --no-restore
    - name: Test
      run: dotnet test --no-build --verbosity normal
実験
ファイルを用意
適当にテストがあるようなソリューション・プロジェクトを作成します。
<project_folder>
|---- DotNetSample
|            |---- DotNetSample.csproj
|            |---- Program.cs
|            |---- StringExtensions.cs
|
|---- DotNetSample.Test
|            |---- DotNetSample.Test.csproj
|            |---- StringExtensionsTest.cs
|
|---- DotNetSample.sln
// Program.cs
namespace DotNetSample;

public class Sample
{
    public static void Main(string[] args) { }
}
// StringExtensions.cs
namespace DotNetSample;

public static class StringExtensions
{
    public static string Reverse(this string value)
    {
        char[] tempArray = value.ToCharArray();
        Array.Reverse(tempArray);
        return new string(tempArray);
    }
}
// StringExtensionsTest.cs
namespace DotNetSample.Test;

public class Tests
{
    [Test]
    public void Test1()
    {
        Assert.That("あいうえお".Reverse(), Is.EqualTo("おえういあ"));
    }
}
DotNetSample.Test.csprojにはDotNetSample.csprojへの依存と、NUnitへの依存を追加してあります。
ローカルで動作確認する
まずはローカルでビルド+テストができるか確認します。
$ cd <.slnが直下にあるフォルダへのパス>
$ dotnet restore
$ dotnet build --no-restore
$ dotnet test --no-build --verbosity normal
GitHub Actionsが動作するか確認する
実際にリモートリポジトリに適応して、GitHub Actionsが正しく動作するのか確認します。

ワークフローの中身
特筆すべきことはSetup .NET Core SDKを使ってるくらいですかね。
github.com